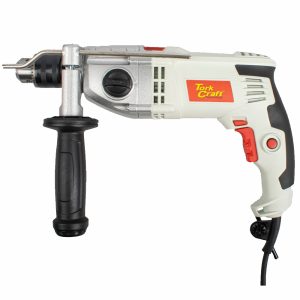
R1 156,52
Max RPM: 0 – 3000
Voltage: 220-240 (50Hz)
Wattage: 850
Application:
Drilling into various steel, plastic, wood and masonry using
various drill bits and accessories.
- Max RPM: 0 – 3000
- Max Chuck Capacity: 13 mm (Keyed)
- Drilling Capacity: Wood 23mm, Steel 13mm and Masonry 13mm
- Max Impact Rate: 0-48000 BPM
- Wattage: 850W
- Voltage: 220-240 (50Hz)
- Modes: Drill & Hammer
- Variable speed control dial
- Trigger lock on button
Accessories Included
- Impact Drill
- Chuck key
- Depth stop rod
- Auxiliary handle
Installing Accessory Bits
Use the provided chuck key to either lock/unlock.
Turn the chuck anti-clockwise until the drill chuck opening is
large enough to accept the accessory.
Insert the accessory into the drill chuck. Turn the ring clockwise
until the tool is clamped tightly. Use the chuck key to properly lock the chuck.
Installing Auxiliary handle
To mount the Auxiliary handle, loosen the screw on the handle
by turning the plastic part anti-clockwise
Mount the handle over the chuck collar till it is flush with the flat
surface of the front of the drill.
Turn the handle plastic part clockwise to clamp it in place.
Trigger lock
To lock the trigger, depress the lock in button situated at the
side of the handle with one hand, while the other hand is
depressing the trigger.
Rotation setting
Reverse: to select reverse rotation, push the lever to the right
side of the drill
Forward: to select forward rotation, release the on/off switch
and push the lever to the left side of the tool.
WARNING: Do not operate power tools in explosive atmospheres, such as in
the presence of flammable liquids, gasses or dust work
conditions. Power tools create sparks that may ignite the dust or
fumes or cause injuries or damage to the surrounding person or
object.
Keep bystanders away while operating a power tool, distractions
can lead to potential loss of control
Always ensure the switch is in the off-position before picking up
or carrying the tool. Always use both hands to hold the tool
when operating.
Never lay the Drill down before the accessory has come to a
complete stop. The spinning accessory may grab the surface and
pull the power tool out of your control or potentially damage
the tool and work surface.
Always ensure there is sufficient light and avoid working in dark
and clustered areas.
Regularly clean the drills air vents, by using an air duster.
(Disconnect tool from the main power supply)